

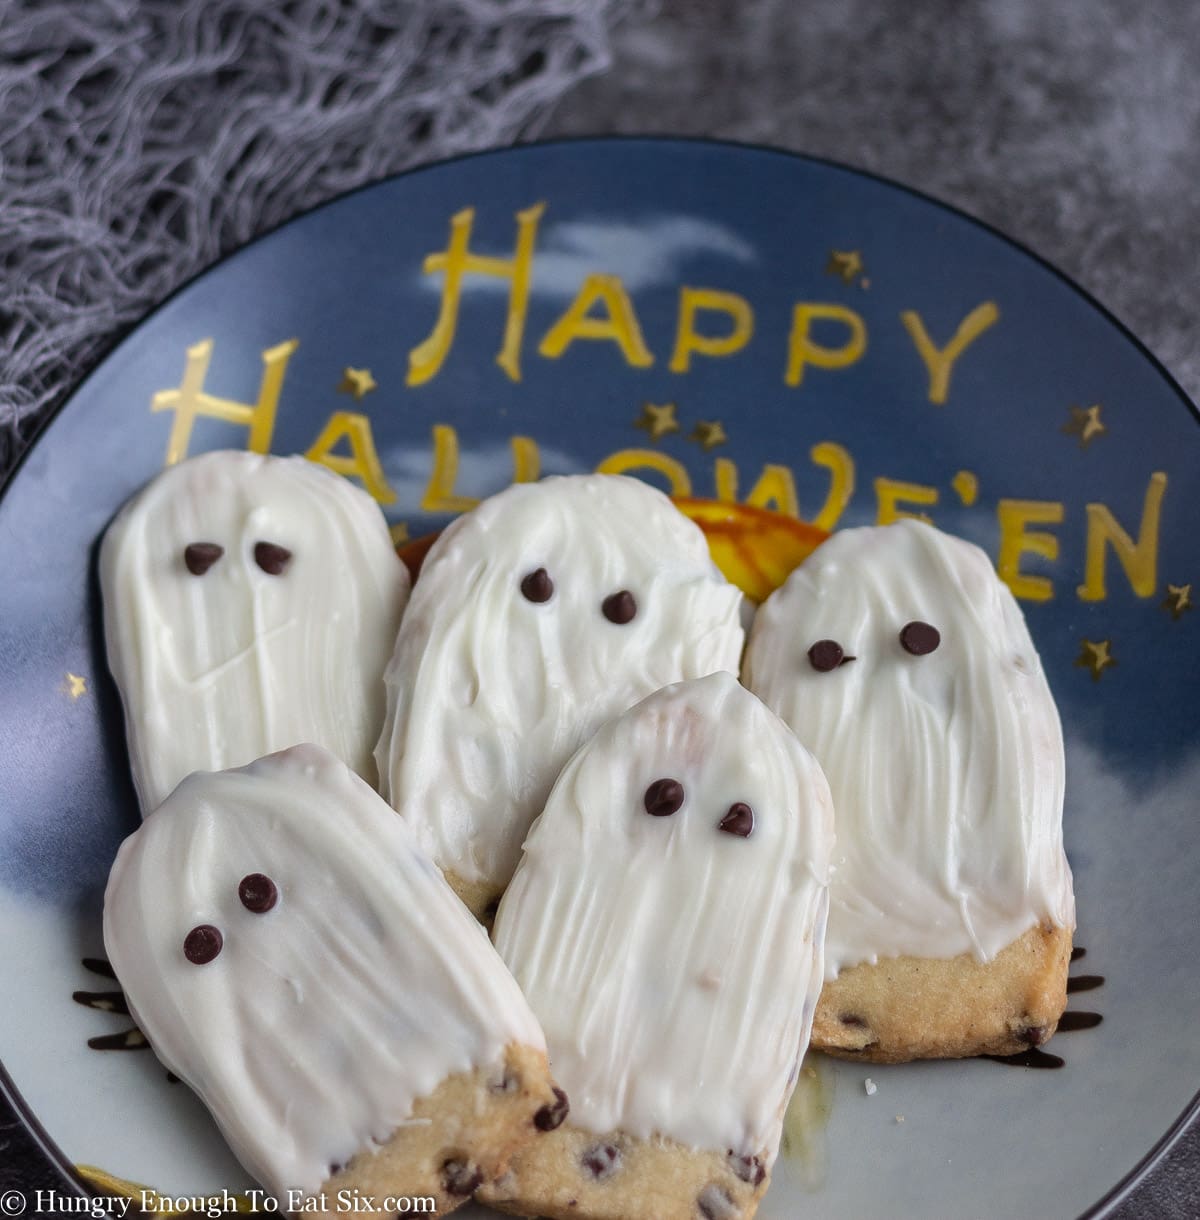
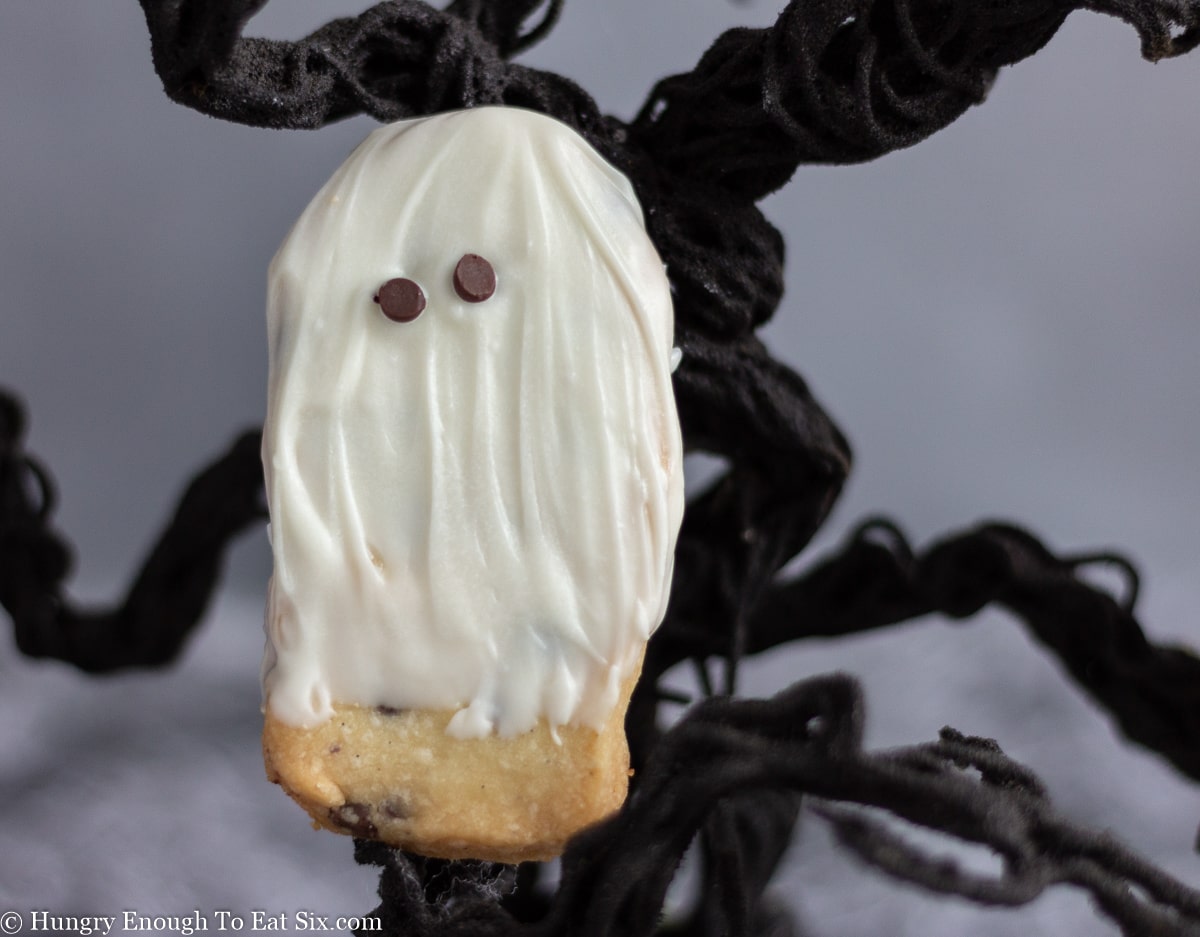
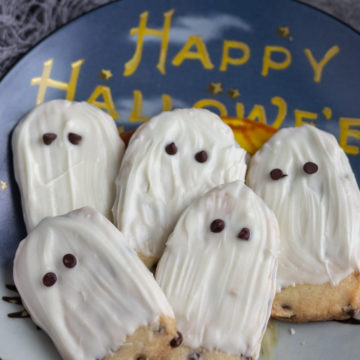
Spooky and tasty! Halloween Ghost Cookies are delicious chocolate chip butter cookies with a ghostly coating of white chocolate.
This post contains affiliate links and I may earn a small commission when you click on the links at no additional cost to you. You can read my full disclaimer here.
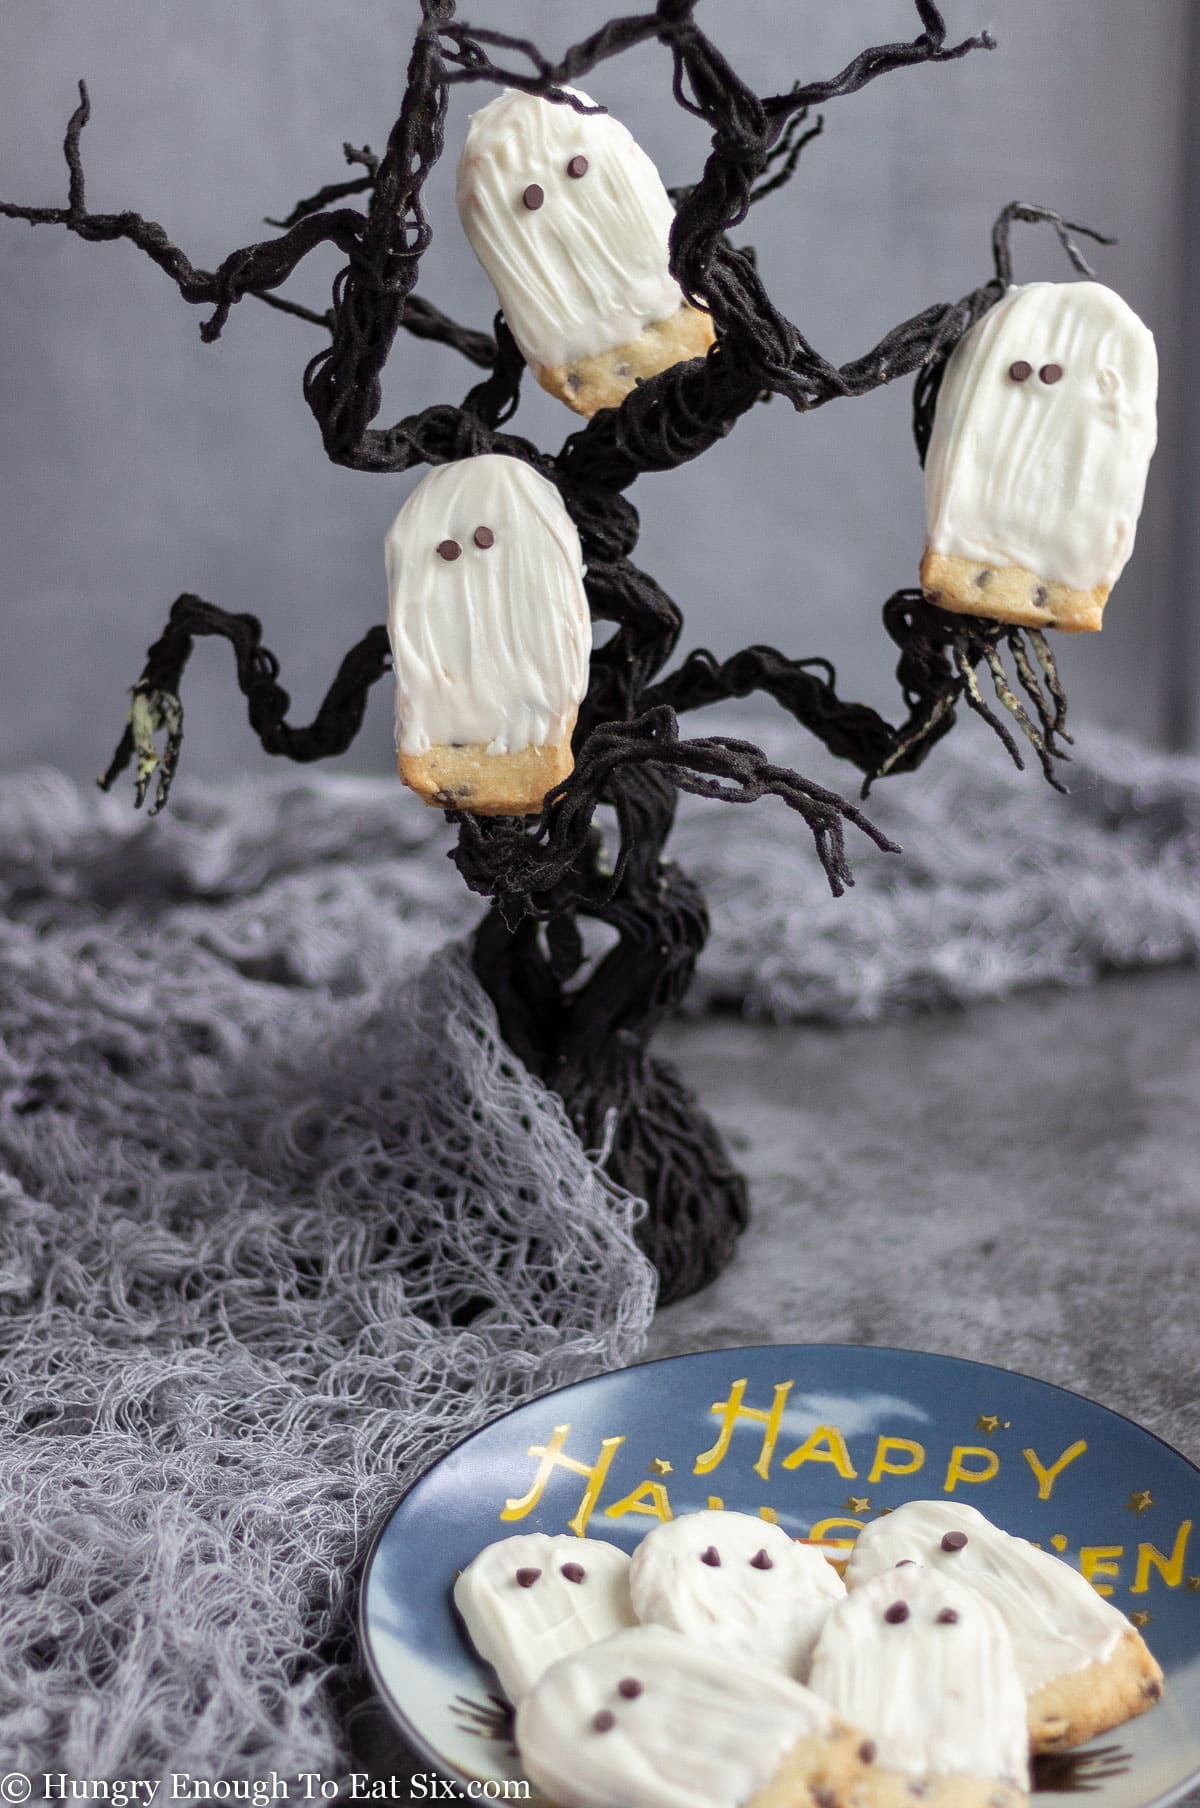
BOO! Sorry if I startled you — I've been surrounded by these little ghosts and they're beginning to get to me! Good thing they're so delicious!
Halloween Ghost Cookies with chocolate chips are a spooky and really tasty treat to roll out this Halloween. Bring a batch to the kids' classroom for a party treat, or put them out on a platter at your own Halloween gathering.
We love making cookies together at holiday time — why not at Halloween time, too? White ghost cookies make All Hallow's Eve extra fun.
Why you'll love these cookies
Well, first of all — BOO! They're ghosts! What a perfect Halloween cookie for kids, friends, and family at Halloween time.
They're easy to make: the cookie dough comes together quickly using just six ingredients. Kids will love to help with this recipe, especially cutting out the ghosts with cookie cutters or by hand.
The ghost cut-out cookies are delicious, too. This Simple Butter Cookies recipe is a favorite: the cookies have a crisp outside and tender inside, full of buttery layers and tiny bits of chocolate.
Melting the white chocolate is easy to do on the stovetop or in the microwave. Use it to paint the cookies and give them their ghostly shrouds.
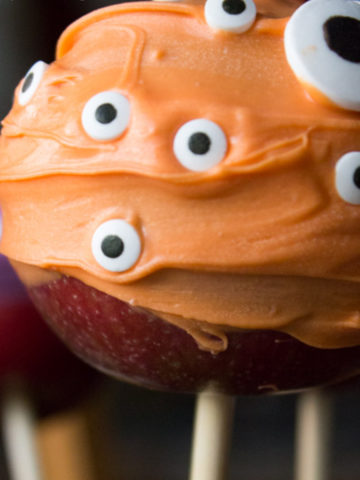
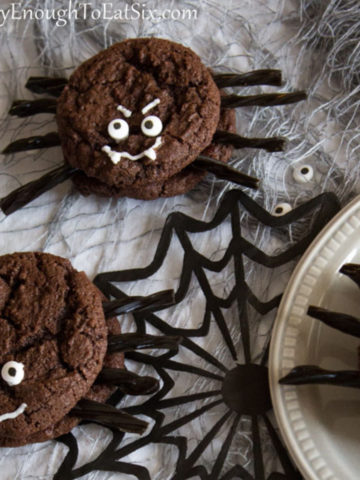
I have more homemade Halloween Treats for you, like Easy Halloween Pudding Cups, Halloween Witches' Hats With Ice Cream Cones, and Creepy Eyeballs Candy-Coated Apples.
Ready to scare up a batch of creepy, chocolate chip ghost cookies?
🔪How to make Halloween Ghost Cookies

Ingredients:
- Unsalted butter
- Confectioner's sugar
- Vanilla extract
- All-purpose flour
- Salt
- Mini chocolate chips
- White chocolate chips
- Vegetable shortening
Step 1: Make the cookie dough

Blend butter and confectioner's sugar together, then add in vanilla extract. Add in the flour and salt, then mix in some mini chocolate chips. Turn the dough out of the mixer and squeeze it a few times to bring it together. Wrap and chill the dough for 30 minutes.
SAVE THIS RECIPE OR POST!
Step 2: Cut out cookies

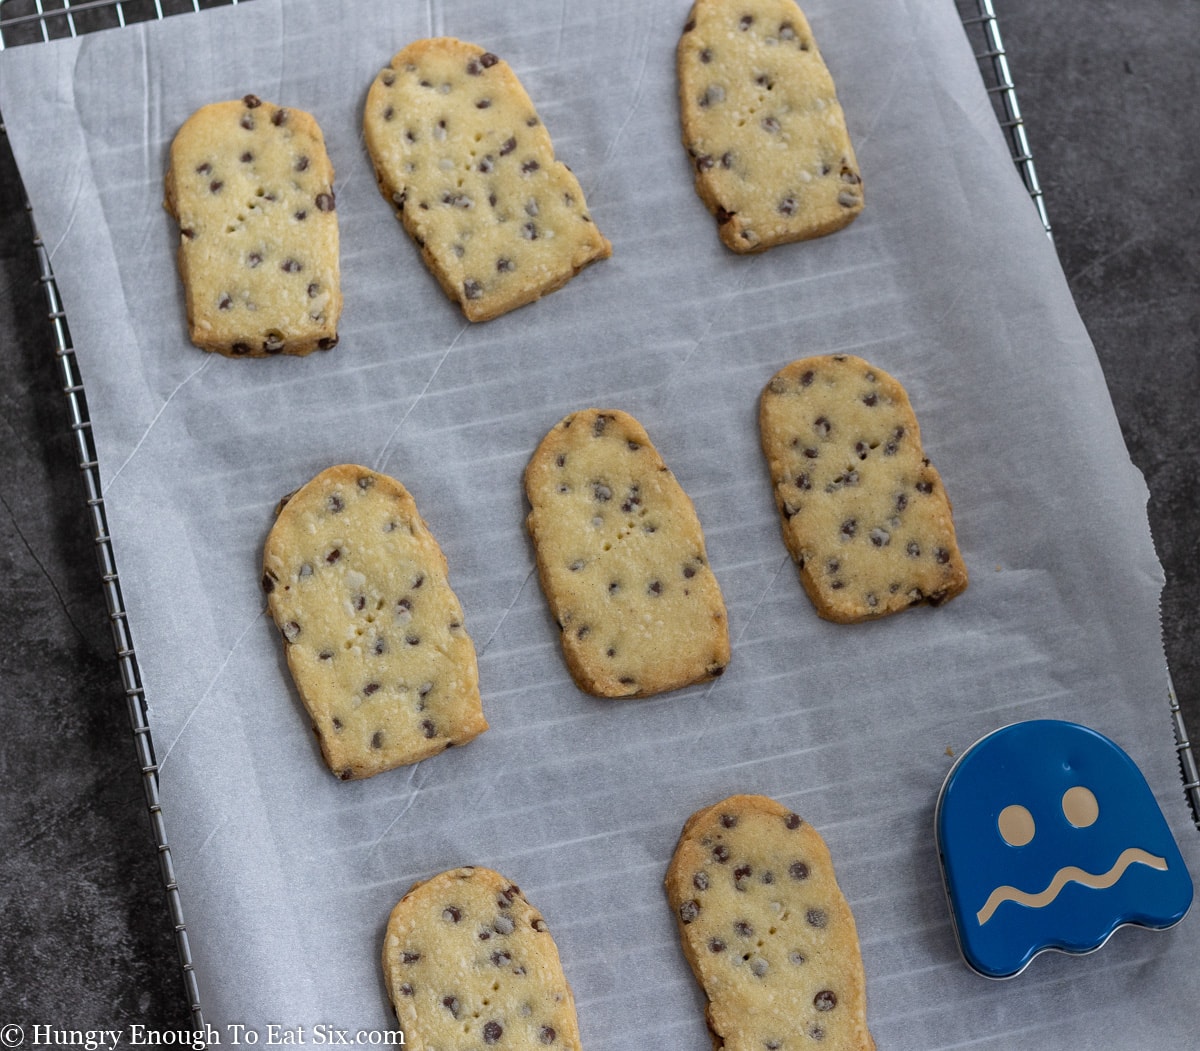
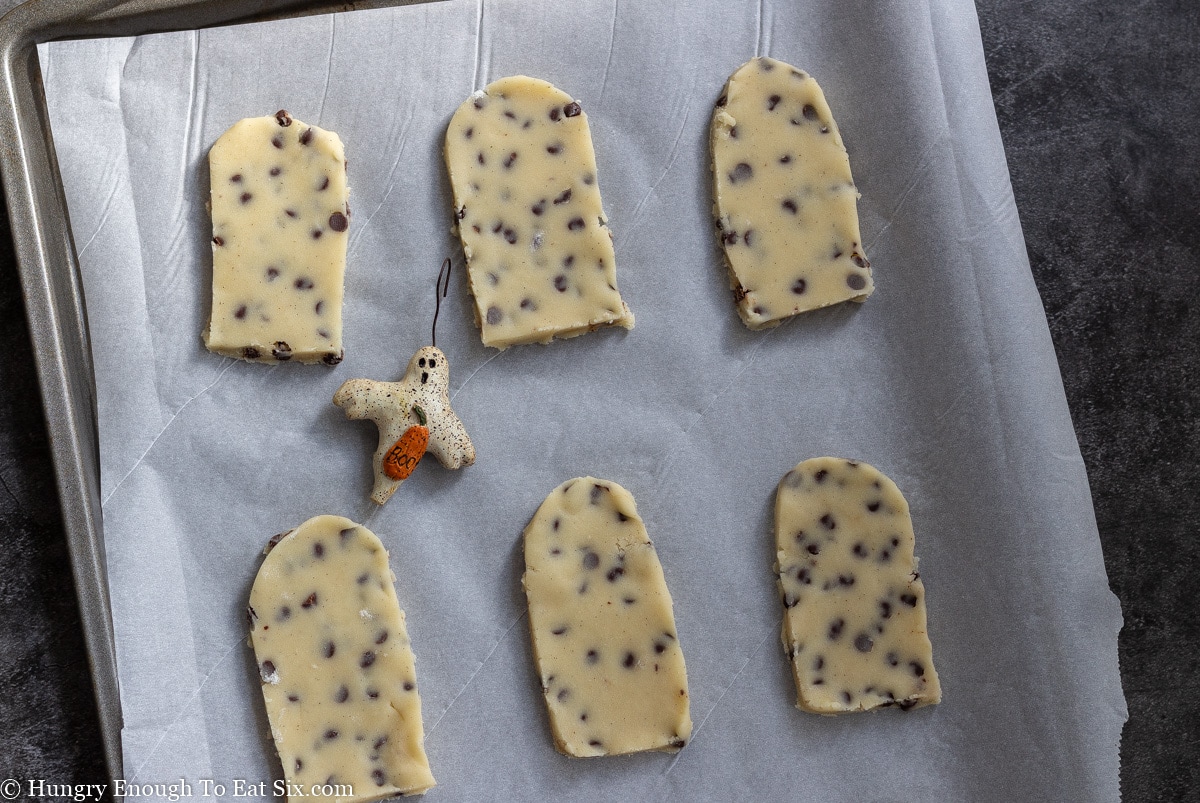
Roll the chilled dough out to a ¼-inch thickness. Use a sharp knife to cut out a simple ghost shape — like a tombstone shape with a rounded top. Place the cutouts on a lined baking sheet. Chill the cutouts for 15 minutes.
Step 3: Bake the cookies
Pop the chilled cookies into the oven and bake them for just under 20 minutes until they're light golden brown. Let these cool. Roll out, cut, and bake cookies until all the dough is used.
Step 4: Melt the white chocolate
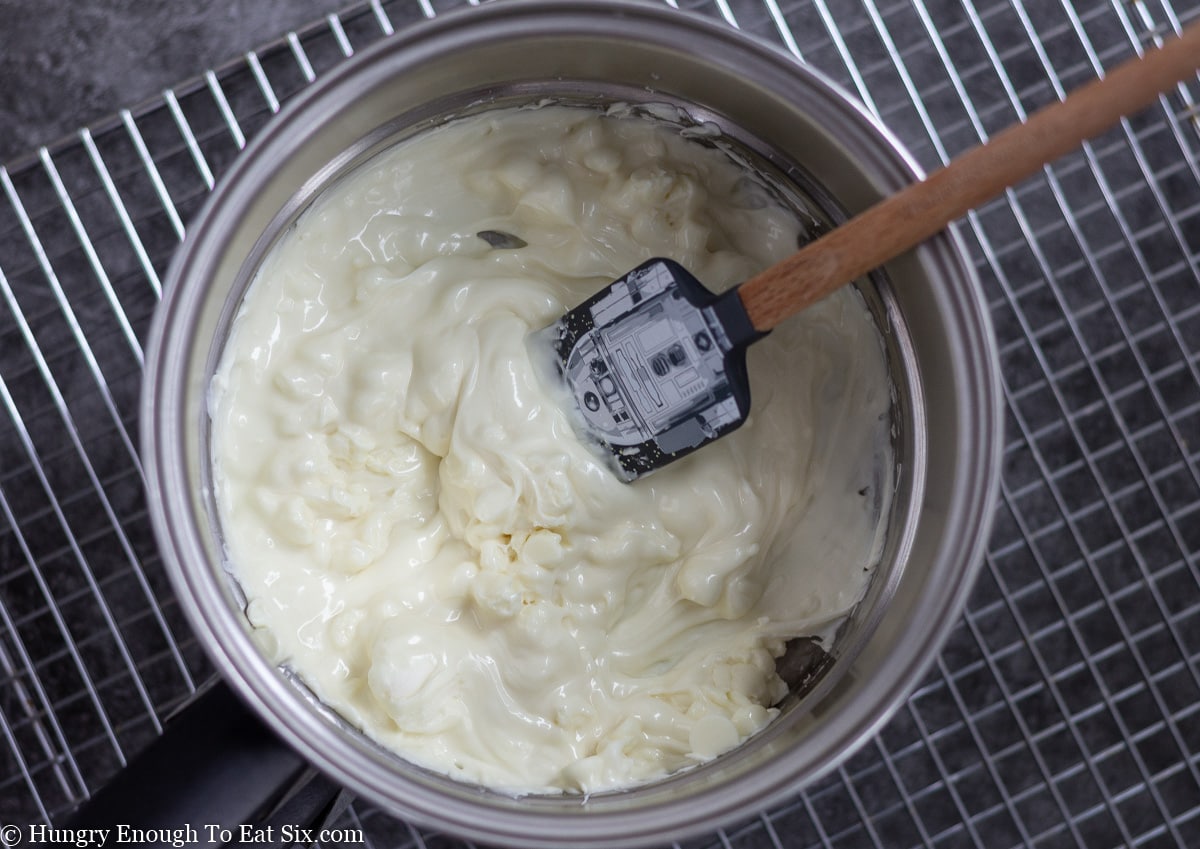
Melt the white chocolate chips together with a little vegetable shortening in the top pan of a double boiler, or in the microwave. The chocolate should be smooth and melted.
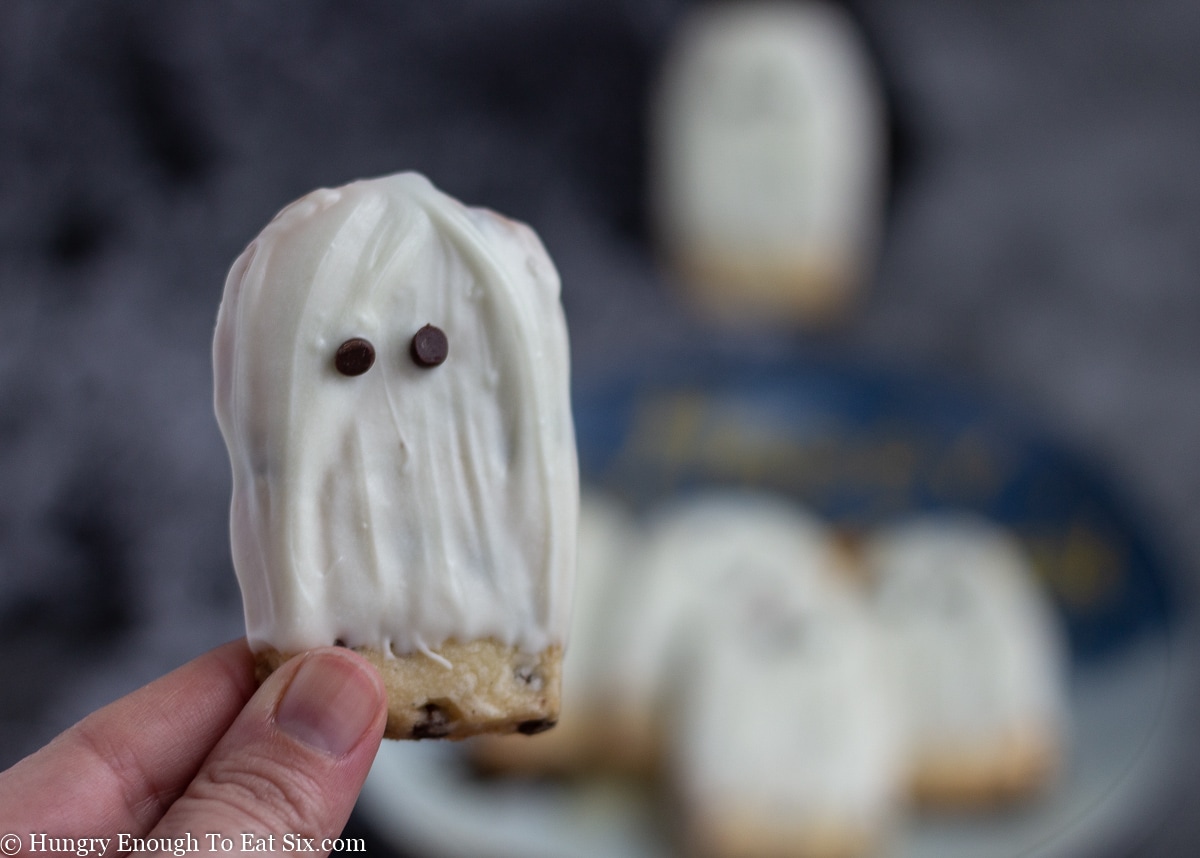
Step 5: Coat the cookies and add eyes
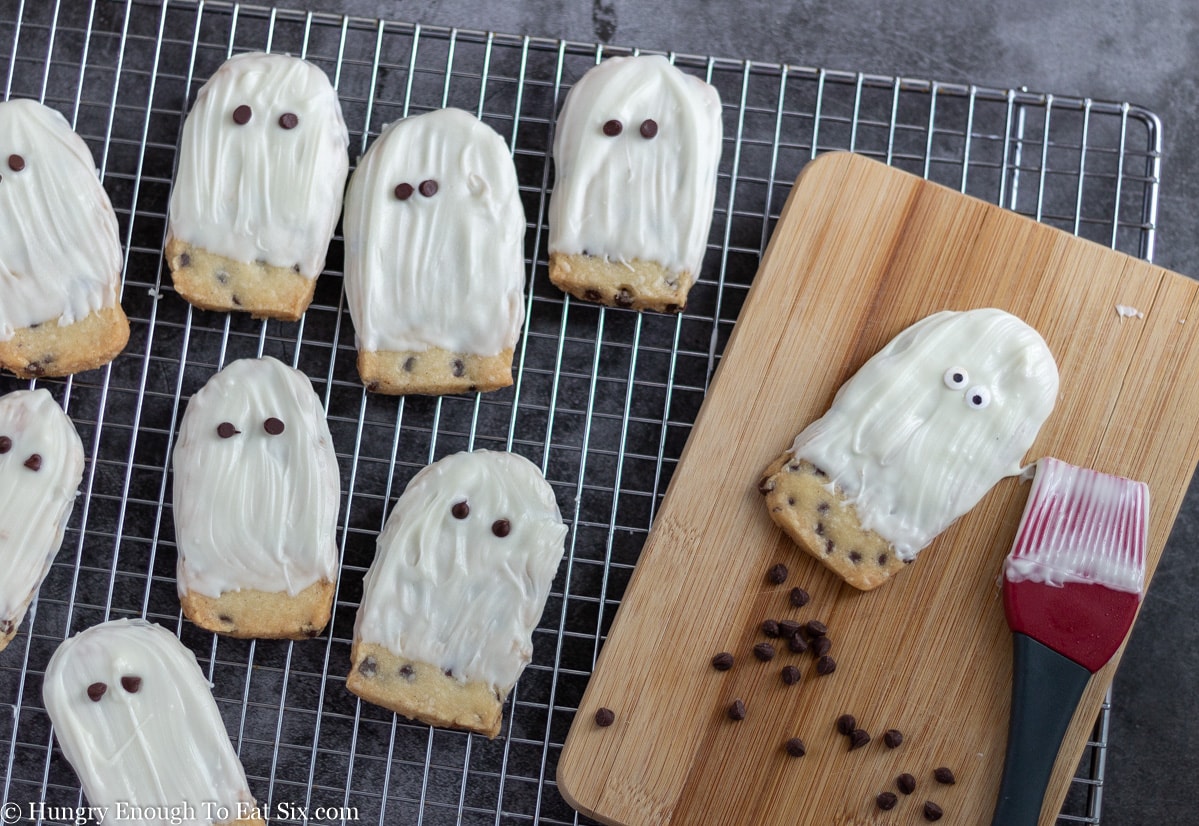
Use a pastry brush to brush white chocolate onto each cookie. Rest the cookies on a cooling rack and add mini chocolate chips for the eyes. Let the cookies sit until the chocolate is firm.
Step 6: Enjoy!
Serve the cookies, or keep them wrapped for up to 3 days.
FAQs
Pour the white chocolate chips and vegetable shortening into a microwave-safe bowl. Microwave them in short, 30-second bursts, stirring between each one, until they're melted and smooth. It's important to not overheat the chocolate—doing so will make it turn hard and seize.
Notes:
- Use the best quality butter you can afford for the spooky ghost cookies. The butter flavor really shines in these cookies, and it's worth using the good stuff.
- This recipe has two chilling times: the first one helps the dough firm up to make it easier to roll out and cut. The second chill helps to keep the cookies from spreading too much while baking. These chills are important so be sure to include them!
- Mini chocolate chips make easy and simple eyes for ghost cookies. If you have small candy eyes, feel free to use these instead.
The recipe for these spooky delicious cookies is below. Here are more fun Halloween treats to make, too!

💬 Tell me what you think of these cookies—leave a comment below!
📖 Recipe
Halloween Ghost Cookies (With Chocolate Chips)
SAVE THIS RECIPE OR POST!
Ingredients
For the cookies:
- 1 cup unsalted butter, softened (2 sticks)
- 1 cup confectioners' sugar
- 3 teaspoons pure vanilla extract
- 2¼ cups all-purpose flour
- ¼ teaspoon salt
- ½ cup mini chocolate chips
For the decorations:
- 2 ¼ cups white chocolate chips
- 2 teaspoons vegetable shortening
- Extra mini chocolate chips for the eyes
Instructions
Make the dough:
- Cream together the butter and confectioner's sugar for 3 minutes on medium speed. Scrape the bowl a couple of times during the mixing, it should be smooth. Add in the vanilla extract and beat the mixture on low to incorporate it.
- In a separate large bowl whisk together the flour and salt. Add this into the butter mixture and mix together on low speed, scraping down the bowl often, until the dough has come together.
- Add in the mini chocolate and mix just until they're distributed through the dough.
- Turn the dough out onto a lightly floured area. Squeeze the dough together just a couple of times so that it is smooth. Wrap the dough in plastic wrap and chill the dough for 30 minutes.
Cut out the cookies:
- Preheat oven to 325° F. Line a baking sheet with parchment paper. The cut cookies will need to chill before baking so be sure the baking sheet can fit in your fridge.
- Unwrap the chilled dough and use a knife to cut it in half. Rewrap one of the halves and hold it in the fridge.
- Place the other half on a large piece of parchment paper. Move the dough to one side of the parchment and fold the other half of the paper over the top of the dough.
- Use a rolling pin to roll the dough inside the parchment to a ¼-inch thickness. (Tip: on a toothpick, measure up from the tip ¼-inch and mark it with a Sharpie. To see if your dough is at ¼ inch thickness, poke the toothpick into the dough and check it against the mark.)
- Cut the cookies out freehand by using a sharp knife to cut out the cookies: they should have a tombstone shape, with a rounded top and a straight bottom. The cookies should be about 3 inches tall and 1½ inches wide.
- Other options are to or make a template from paper or cardstock, or to use a ghost-shaped cookie cutter.
- Place the cookies onto the parchment lined baking sheet, leaving about 1 inch between them. Roll scraps together and continue cutting cookies to fill the baking sheet. Place the baking sheet into the refrigerator for 15 minutes.
- If you have unused dough, wrap it in plastic and refrigerate it also, until you're ready to roll and cut the next batch.
Bake the cookies:
- After chilling, put the cookies in the oven and bake them for about 18 minutes: check them after 15—bake the cookies only until the edges and tops have very lightly browned.
- Remove the cookies from the oven and transfer them to a cooling rack to cool completely. Finish rolling, cutting and baking any additional dough you have left. Let all the cookies cool.
Melt the white chocolate: 2 Methods
- In the Microwave: Pour the white chocolate chips and vegetable shortening into a microwave-safe bowl. Microwave them in short, 30-second bursts, stirring between each one, until they're melted and smooth. It's important to not over-heat the chocolate.
- Or on the Stovetop: Pour the white chocolate chips and the vegetable shortening into the top pan of a double boiler, with water in the bottom pan. Heat the water to a simmer. Stir the chocolate until everything is melted and smooth.
Coat the cookies:
- Have a cooling rack of piece of waxed paper ready for the cookies.
- Working with one cookie at a time, use a pastry brush to brush white chocolate over the front and sides of the cookies. Leave about a ½-inch at the bottom of the cookie uncovered. Place the cookie on the rack or waxed paper.
- Place two mini chocolate chips on the ghost for eyes.
- Continue brushing chocolate over the rest of the ghosts and adding mini chocolate chip eyes.
- Let the cookies sit until the chocolate is firm, which should only take 15 minutes or so. The serve the cookies and enjoy!
- Store leftover cookies in an airtight container for up to 3 days.
Notes
Tips:
- This recipe has two chilling times: the first one helps the dough firm up to make it easier to roll out and cut. The second chill helps to keep the cookies from spreading too much while baking. These chills are important so be sure to include them!
- Mini chocolate chips make easy and simple eyes for ghost cookies. If you have small candy eyes, feel free to use these instead.
Nutrition


Comments
No Comments