


My from-scratch All Butter Pie Crust recipe will make your favorite New England pies even more delicious! I'll show you exactly how to get a perfectly flaky crust every single time with my how-to guide and tips.
This post contains affiliate links and I may earn a small commission when you click on the links at no additional cost to you. You can read my full disclaimer here.
The best-tasting pie crust is homemade, and one that's made with just a few ingredients! Learn everything you need to know to make a from-scratch, All Butter Pie Crust without fear.
I'll show you how to bring the dough ingredients together, and give you the best tips so that your pie crust turns out perfect every time. I'll also show you how to make easy, flaky Butter Pie Crust dough in advance, and even a variation for savory pies.
Get ready to make the most delicious pie crust you've ever tasted!

In a nutshell... 🐿️
- What this is: A go-to recipe and guide for a perfect, all butter pie crust, inspired by the New England tradition of welcoming every season with a special homemade pie.
- You'll love this part: The recipe creates a flaky, buttery crust that's just as delicious as the filling it holds, for a really special pie. And I'll walk you through every step.
- How it's made: Cut cold butter into flour, add flavorings, and add ice water to make a dough. The complete how-to guide, tips, and answers to your questions are below.
Jump to:
- Why you'll love this all butter crust recipe
- What is an all butter pie crust?
- All Butter Pie Crust Essential Ingredients 🧈
- 🔪 How to make pie dough from scratch, my All Butter Pie Crust
- Watch how I bring the pie crust dough together
- Option: Use a food processor
- 🥧 Homemade pie crust tips
- What does overworked dough feel like?
- Remember, this is a puffy pie crust
- All Butter Pie Crust FAQs and Troubleshooting
- No one wants a soggy bottom!
- Variation: Butter Pie Crust for savory pies
- What to make with an all butter pie crust
- Give the Butter Pie Crust a pretty finish
- 📖 Recipe
- 💬 Comments
Why you'll love this all butter crust recipe
People often ask if I like to make pies. I do! Pie lovers are certainly not limited to New England, but there's no denying that they're a special part of our lives, traditions, and celebrations.
New Englanders mark the change of seasons in many ways, and very often with a pie! Apple pies in autumn, pumpkin pies at Thanksgiving, savory pies to warm us up in winter, and sweet berry pies in summer. Oh yes, I do love making pies.
That's why I feel sad when folks tell me that they're afraid to try making pie crust from scratch. I can see they're very curious about it, but that homemade dough just seems way too hard. I once felt this way, too. After all, no one wants to ruin a pie with a tough, leaky, flavorless crust.
That all changed after I took a pie-making class at King Arthur Baking Company in Norwich, Vermont. I learned from the pros—and I no longer fear homemade pie crust! They showed me the straightforward technique of turning simple ingredients into a flaky pie crust. Now I am the pro, and I'm going to teach you!
What is an all butter pie crust?
Pie crust dough, or pastry dough, is made with flour, water or other liquids, and fat. The fats used are typically vegetable shortening (like Crisco), lard (rendered pig fat), or butter—or a blend of these fats. An all butter pie crust is made with only butter.
A pie is more than just the filling: the very best pie crusts have flavor and flakiness that cradle and complement the fillings. And I think that all butter pie crusts are the very best. Buttercrust pies have impressive, flaky layers and the best flavor that comes from using sweet, well-made butter.
Old-fashioned butter pie crust dough is delicious with any sweet filling. And my recipe goes a step further with a hint of cinnamon and vanilla in the dough. (Making a savory pie? There's a variation for that below!)
All Butter Pie Crust Essential Ingredients 🧈
- Cold butter: This is the most important ingredient! Butter gives the pie crust its light, flaky texture as well as plenty of flavor. So, don't skimp on the quality or freshness. The best butter for pie crust is a brand known for quality and flavor, such as Cabot, Kate's, Kerrygold, or Plugra. Also, use unsalted butter. Salted butters can sometimes be hiding off or old flavors. Besides, you'll add your own salt to this recipe.
- Flour: The crust is made with easy-to-find all-purpose flour. My go-to brand for all flours is King Arthur Baking Company. I know I can count on King Arthur for a quality flavor and consistent results. Plus, it's made in Vermont! ♥
- Ice Water: Have a cup of ice water ready to go when you begin making your crust—a mug or shallow bowl with cold water and lots of ice. Cold butter and water are crucial to getting the best crust texture.
- Salt: You only need a small amount of salt, but it makes a world of difference in the flavor of the crust.
My secret pie crust ingredients 🤫
- Vanilla extract: My secret to an exceptionally scrumptious pie crust is that I add flavor to it! That's why my pies stand out amongst those made with flavorless crusts. The first flavor I add is vanilla extract. Use a good brand for the best flavor, such as Nielsen-Massey vanilla.
- Cinnamon: Just a smidge of cinnamon in the pie dough is my other secret ingredient. Cinnamon goes with any sweet filling: custard, fruit, pumpkin, chocolate, anything! A hint of the spice in the crust enhances the overall flavor.
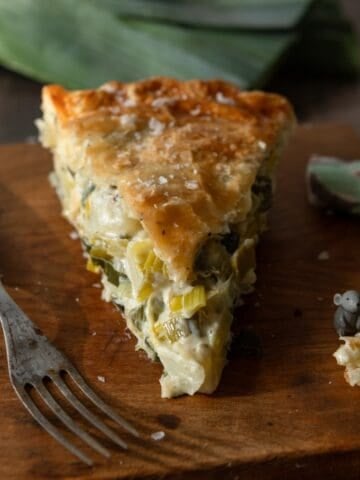
For savory pies, like Leek and Potato Pie, Chicken Pot Pie, or hand-held Thanksgiving Pocket Pies, see the Variations below!
🔪 How to make pie dough from scratch, my All Butter Pie Crust
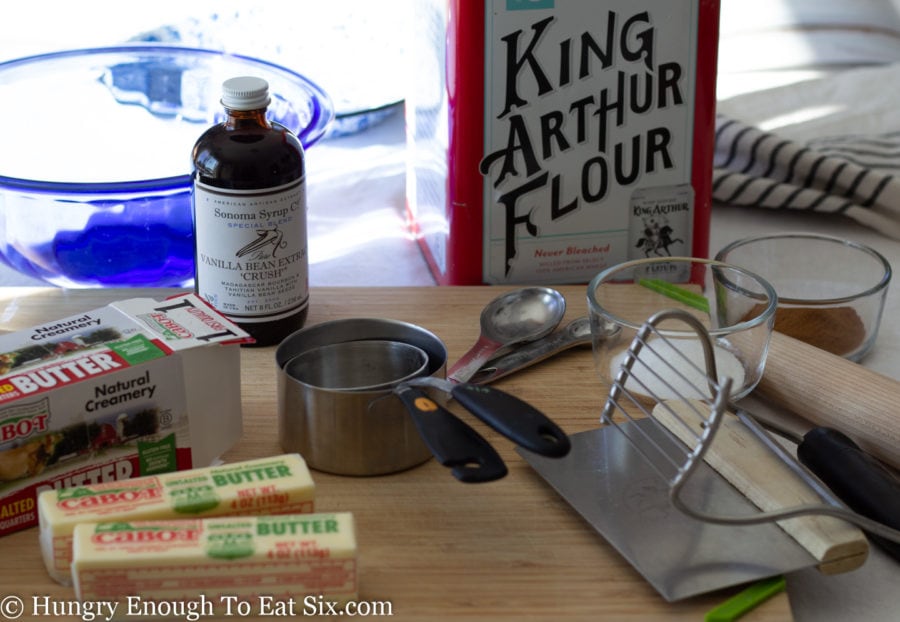
Get Organized
Have a large, clean surface. Set out your ingredients and tools. Place a cup of ice water in the fridge.
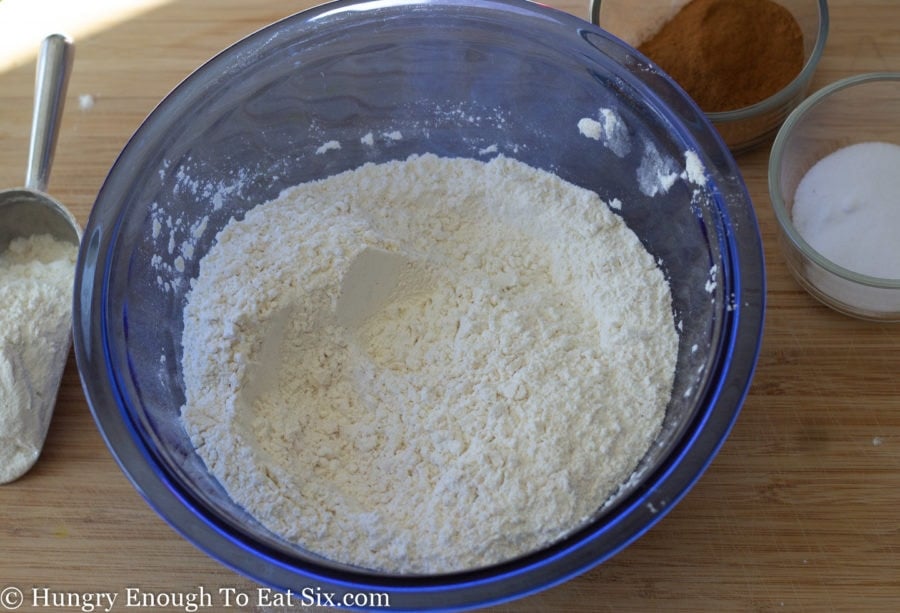
Combine dry ingredients
Measure the flour, salt, and cinnamon into a large bowl and mix them.
Cube the butter
Slice cold butter into small cubes. Add them to the bowl and toss them with the flour mixture.

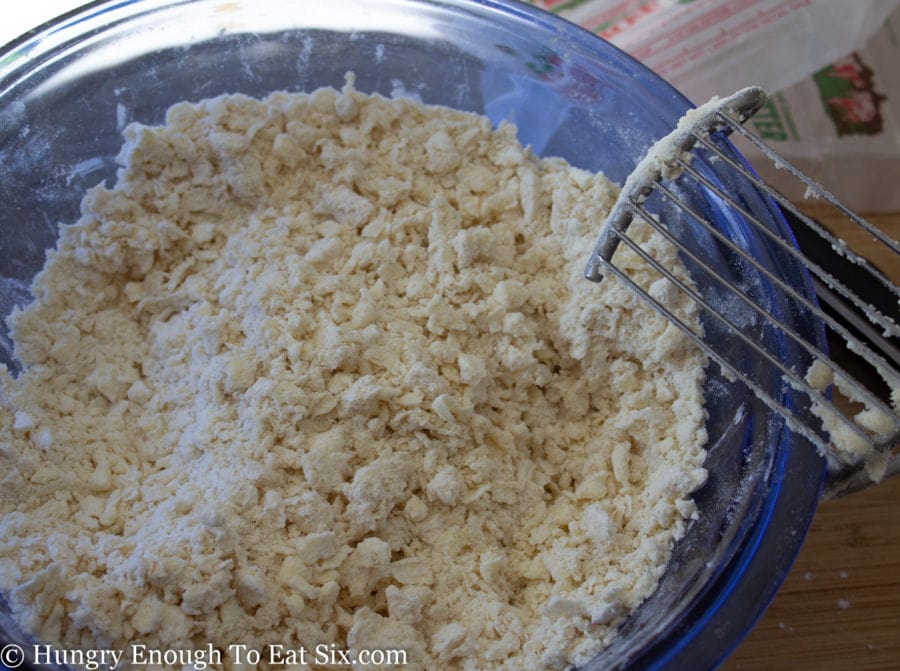
Combine butter and dry ingredients
Use your pastry blender to cut butter into the dry mixture until the mixture has a shaggy, crumbly look with tiny pieces of butter.
Add ice water
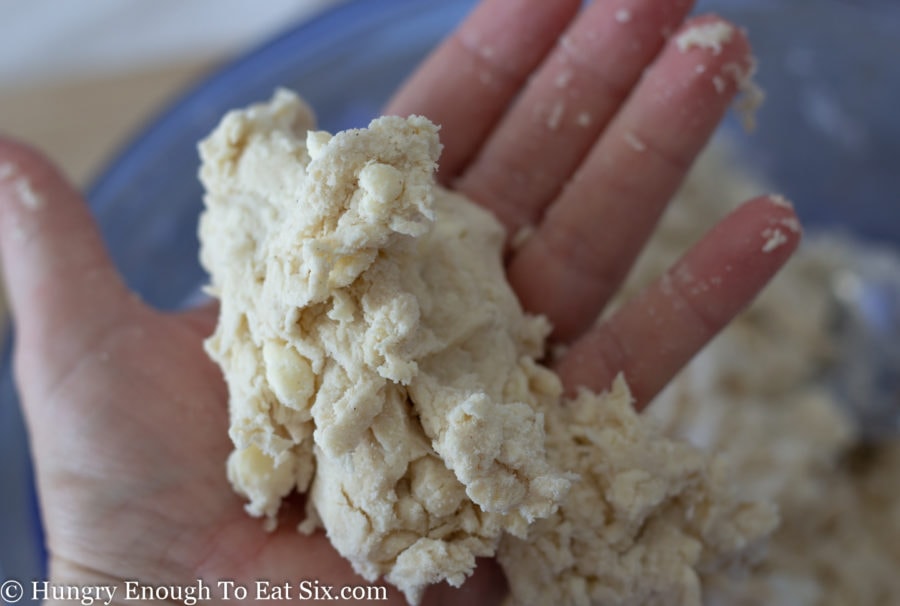
Add in the vanilla, then add ice water slowly to the bowl. Stir after each addition. As the ingredients begin to clump together, reach in and squeeze a handful of the mixture together. If it holds together, it's ready.

Bring the dough together
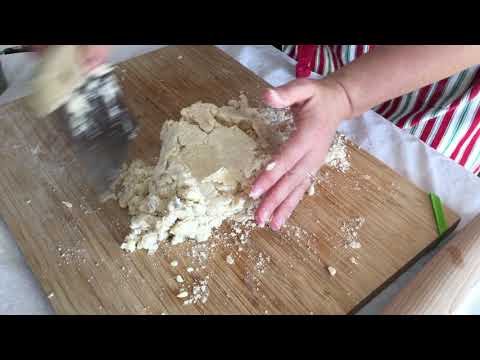
Pour out the mixture onto your work surface. Bring your hands around the pile and squeeze it together a few times, gathering up the drier bits from the bottom. Use your bench scraper to lightly fold and press the dough a few times until it comes together.
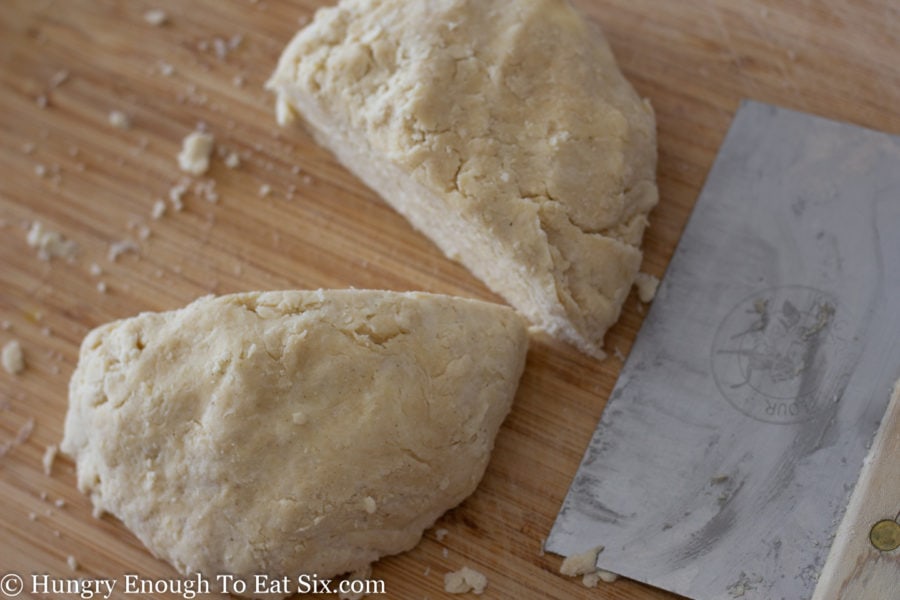
Chill
Cut the dough in half. Shape each portion into flattened disks, and wrap them in plastic wrap. Refrigerate the dough for 30 minutes. Then, it's ready to be rolled for your pie.
Watch how I bring the pie crust dough together
Option: Use a food processor
Instead of by hand, you can use a food processor to bring the dough together. The advantage to using this tool is it can save a little time and keep your hands cleaner.
However, you do have to pay close attention so that you don't over-process the dough, which can easily happen. See the recipe card below for instructions on using a food processor.
SAVE THIS RECIPE OR POST!
🥧 Homemade pie crust tips
📋 Be organized:
- Have a clean work surface ready. I use a very large cutting board; you can also use a large area of your kitchen counter or table.
- Set out the flour, salt, flavorings, measuring cups, and measuring spoons. Also have a large bowl, a knife to cut the butter, a rolling pin, a pastry cutter, and a large spoon ready.
- Getting organized this way before you begin will help keep your ingredients cold and help you make the dough more quickly.
🥶 Keep things cold:
- Cold butter will puff up the crust and create flaky layers. To keep it cold, your butter should stay in the fridge right up until you need it.
- Use ice water to moisten the butter pastry dough ingredients. Pour very cold water into a bowl or mug and add several ice cubes.
- The dough also needs to stay cold, so don't skip the chilling periods. At any point while working with your dough, if it seems to be too warm, hard to handle, or greasy-looking, put it in the fridge to let it chill and firm up.
💧 Add just enough water:
- Too much water will result in a pie crust dough that falls apart and slumps in the pan. The amount of water you need will vary depending on the humidity in the air.
- So, add ice water slowly; start with just four tablespoons. Stir the ingredients together, then add more water one tablespoon at a time.
- Squeeze a handful of dough together after each addition of water. If the mixture is crumbly, add more water. As soon as most of the dough holds together when squeezed, don't add any more water!
🙌 Don't over-handle dough:
- Use a light touch with the dough so that it doesn't get overworked. Fold it together just a few times, and stop as soon as it seems uniform.
What does overworked dough feel like?
Pie pastry dough that is handled too much, when bringing the dough together or while rolling and re-rolling, will feel very tough. It will be difficult to roll out or shape. When baked, overworked dough will have a chewy texture.
To avoid this, remember to add the water slowly; once it holds together, squeeze and fold it together just enough to make a dough, then wrap and chill it.
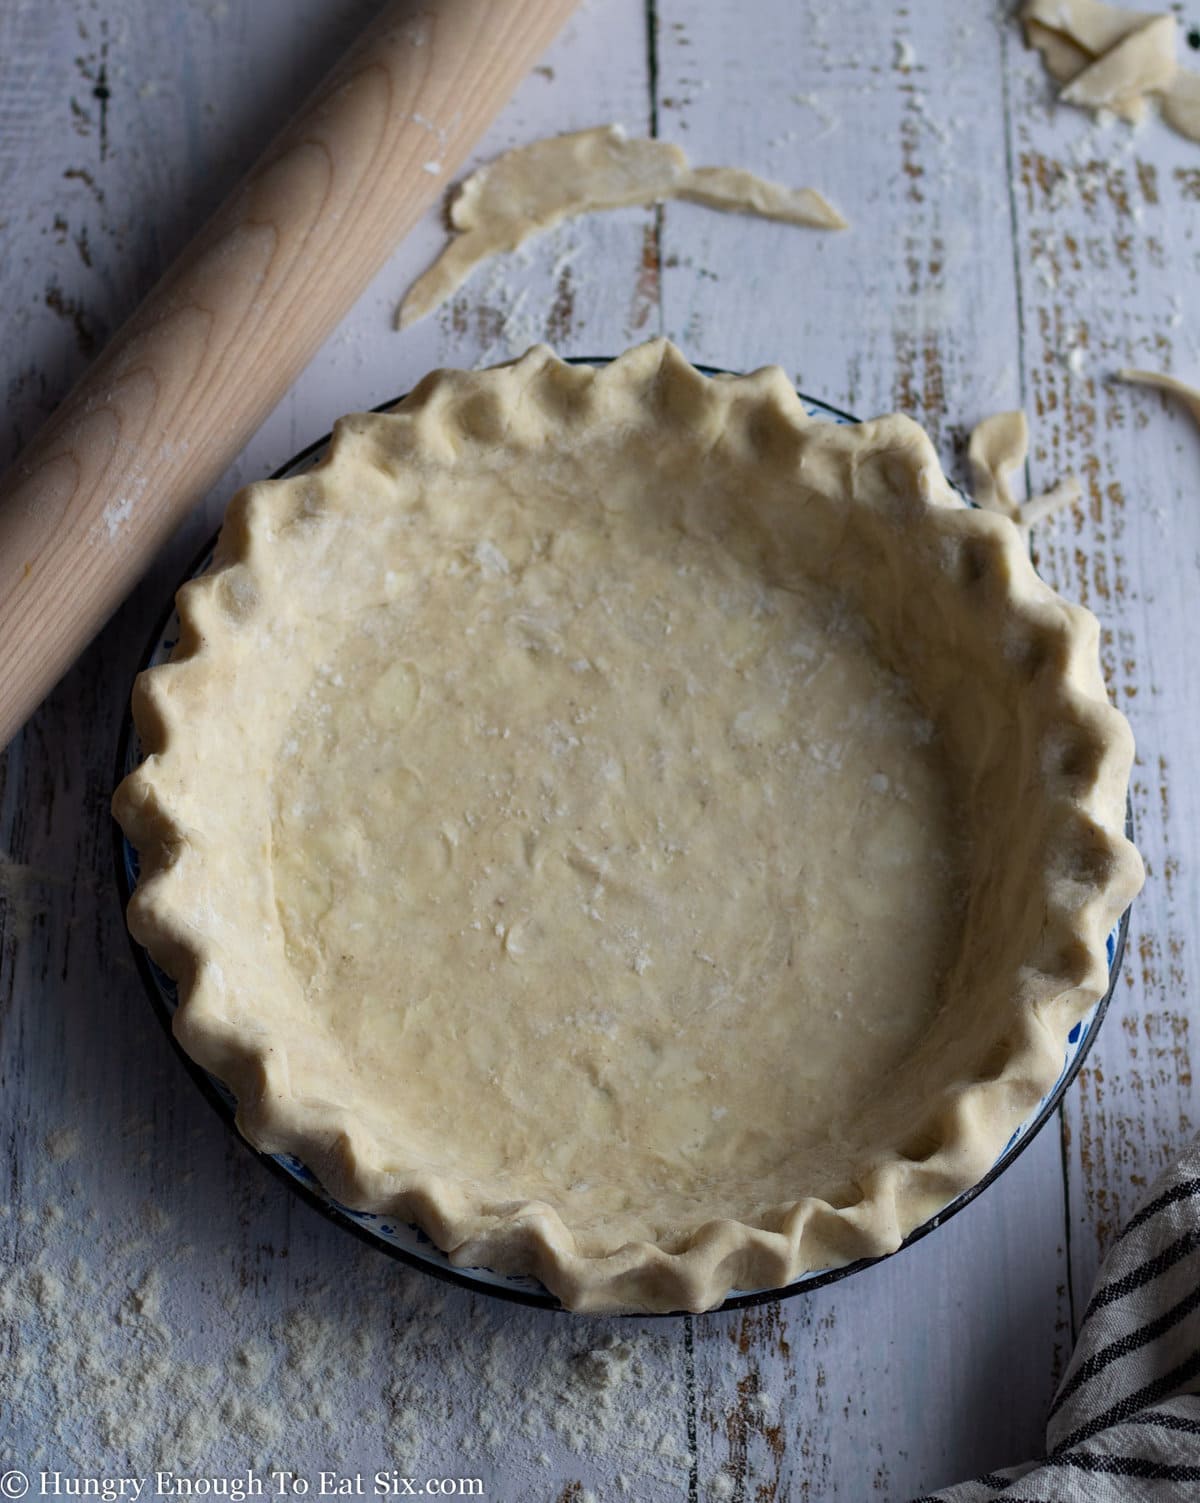
Remember, this is a puffy pie crust
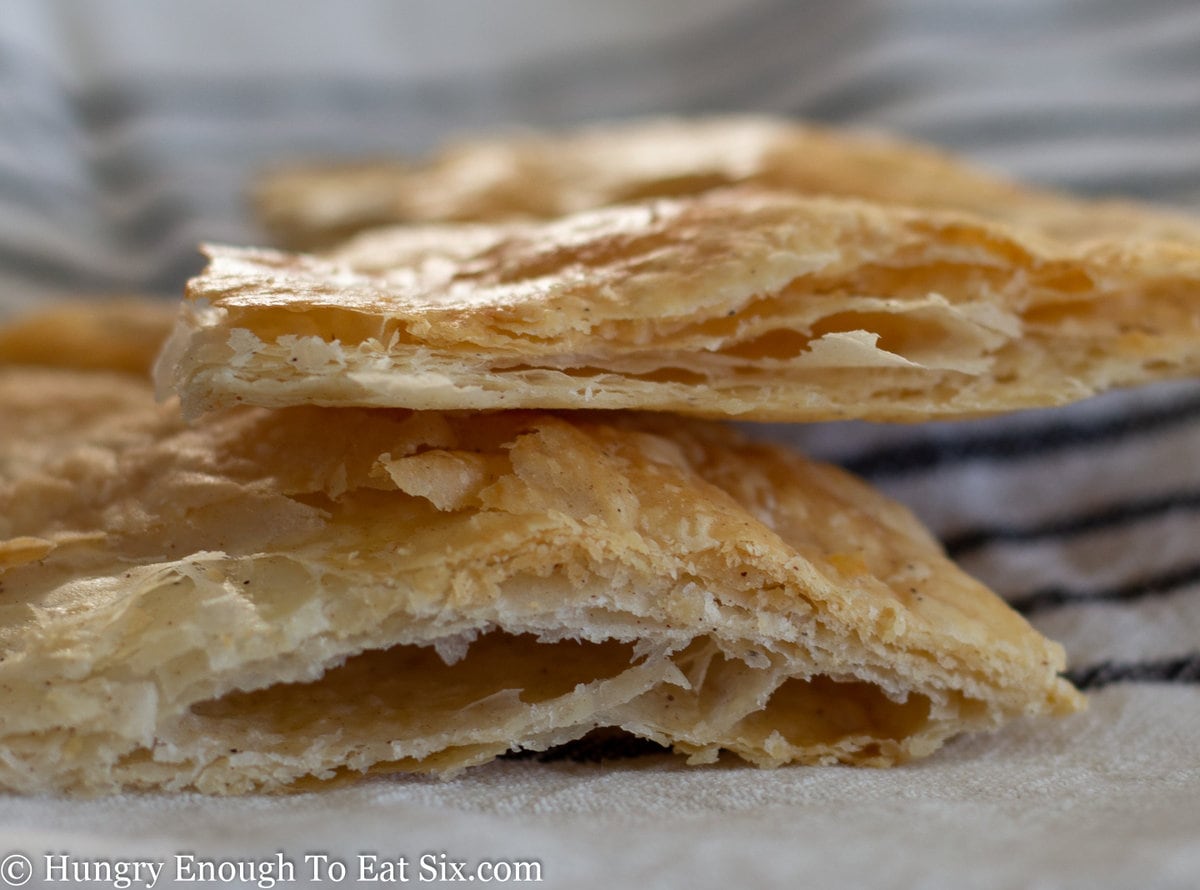
All butter flaky pie crust puffs up a whole lot during baking. Because of this, it gives pies a gorgeous, rustic look.
This butter pie pastry works best with simple cut-outs and lattice tops. Very intricate cut-outs may lose their definition. Chilling the pie before baking will help minimize this. You can also use a dough made with all or half shortening for intricate pies.

All Butter Pie Crust FAQs and Troubleshooting
Cold butter is the secret to a flaky crust. When the dough is rolled out, you should be able to see little pieces of butter suspended throughout. As the butter pie crust bakes, the water in the butter turns to steam, puffing up the crust to create layers and flakes.
Butter is made up of mostly butterfat, plus milk solids and water. When butter is solid and cold, the water is trapped inside. Once the dough hits the oven, the water turns to steam, and that steam helps puff up the pie crust dough mixture to make flaky layers. (This same process is also how croissants and puff pastry get their layers!)
The problem is that butter has a low melting point (around 90°F) and can quickly become very soft or even begin to melt—this happens when it's mixed with warm water, when it's handled too much by warm hands, or when it's very hot in the kitchen.
If a butter dough is warm when it goes into the oven, the butter will liquefy too fast and melt out of the dough before the steam can create the puffy layers.
Keeping the butter cold, using ice water, chilling the dough, and minimal handling are all ways to keep things cool and get the flaky texture we seek!
There are pros and cons to a crust made with all shortening. Shortening-based pie dough is easier to handle because shortening has a higher melting point than butter. It also creates a tender crust. The downside is that shortening crusts won't have the flakiness of butter crusts or the flavor either. I also find that shortening leaves a filmy mouthfeel.
If you would really like to use some shortening in your pie crust dough, I recommend a compromise of half butter and half shortening. This way, the pie crust will still have a buttery flavor and some of the flakiness.
Fortunately, regular, easy-to-find all-purpose flour makes an excellent pie crust. My preference is King Arthur Baking Company brand, because it's a New England company and a high-quality product. Whichever brand you choose, make sure the flour is fresh. (Check that expiration date!)
In their article about the best pie crust, King Arthur Baking shares that flours with lower protein content produce a more tender crust. Although fine pastry flour has a very low protein content, it produces a dough that's trickier to work with, especially for those new to pie making. All-purpose flour is a perfect compromise for a tender dough that's also easy to roll out and shape.
What this process does is to cut the cold butter into tiny pieces while also coating them in flour. To do it, drop small cubes of cold butter into your flour mixture. Use a pastry blender tool; press it with a slicing motion through the butter to cut it up. You can also use a fork in each hand to pull the butter into pieces, but this may take a little longer.
If the pie dough is sticky, it's likely getting too warm. Pop the dough into the fridge for 20 to 30 minutes to firm it up. If it's still a little sticky, add a light dusting of flour to your work table and rolling pin. When rolling out the dough, pick it up and rotate it a quarter-turn each time, so it won't have the chance to stick.
If your pie dough is crumbly or cracking too much when you roll it out, it needs a little more ice water. Sprinkle some ice water over the surface and try rolling again.
A small amount of butter will leak out of the pie crust dough during baking, which is normal. However, if you see that a lot of butter is melting out of your pie crust, and that it's flat with no definition, it means that the dough was too warm when you put it in the oven. Unfortunately, there's not much you can do at this point; the filling will still be good, but the crust will be thin and tough.
The way we prevent all the butter from melting out of the dough is to have it very cold before it goes into the oven. It's the whole reason I stress keeping butter and dough cold throughout the process. If at any point the dough seems warm, floppy, greasy, or if it tears easily, you can save it by putting it into the fridge to chill.
There are a few reasons why pie crusts shrink during baking, including over-handling the dough, not giving the crust enough support during blind baking, and adding too much water to the dough. Follow the recipe directions to avoid these pitfalls.
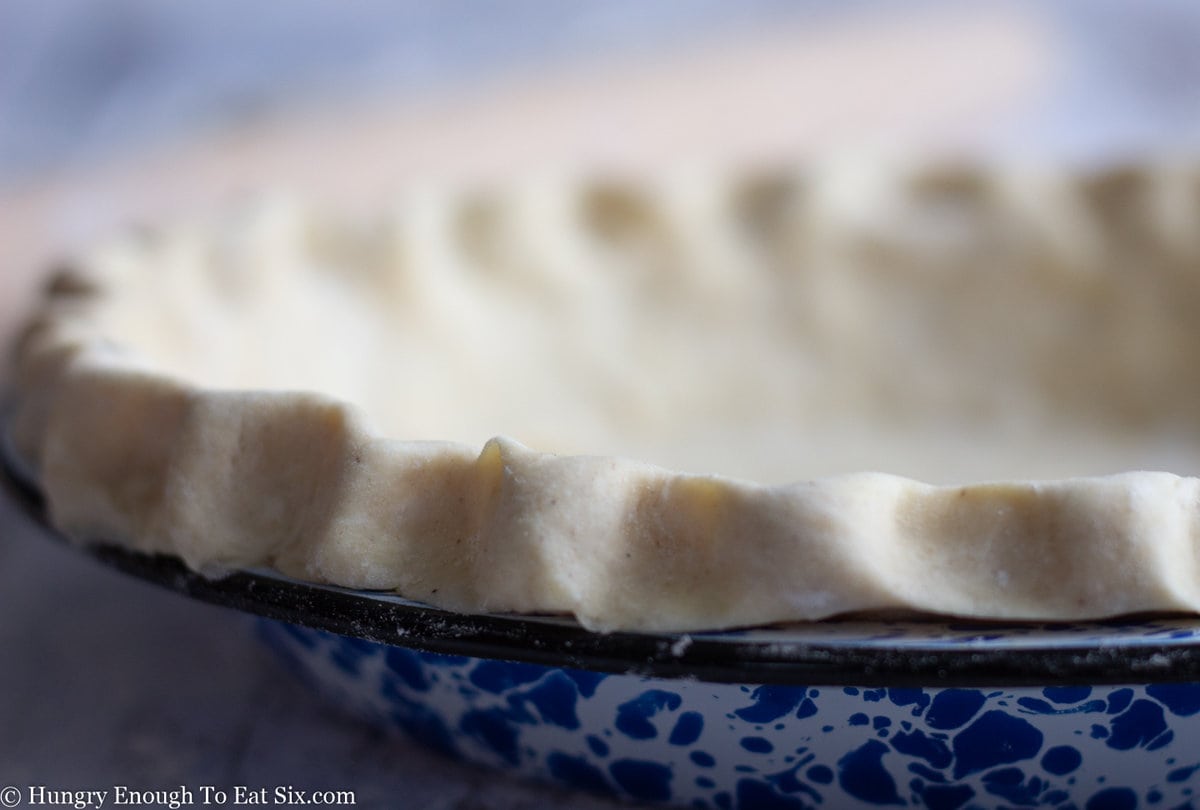
There are a few ways to prevent slumping. Make a thicker pie crust edge and pinch it firmly to the edge of the pie plate, so that it stays in place during baking. You can also freeze your pie crust after rolling it and pressing it into the pan, to firm up the butter in the dough even more.
Use pie weights when blind baking a single pie crust shell to hold the crust in place. Line the pie shell with foil or parchment, and fill it with pie weights. (Like ceramic beans or dried beans.) Fill it to the edge to keep it from slumping.
Yes, and this is a great way to save some time the day you want to bake your pie! After fitting the dough into the pie pan and trimming the edges, wrap the crust well in freezer-proof food wrap. Freeze the pie shell for up to three months.
To thaw the crust, move it to the refrigerator 24 hours before you plan to fill and bake the pie.

Make pie easy!
Shop my favorite baking tools
Including pie pans, weights, and pastry cutting gadgets.
No one wants a soggy bottom!
Anyone who's watched The Great British Baking Show knows all too well about the dreaded soggy bottoms!
Pies can end up with a soggy bottom when the filling soaks into the bottom crust, preventing it from baking through. The result is raw or wet dough on the bottom of the pie, and filling that falls through the bottom of the slice when you try to take a serving.
Here are a couple of ways to make sure your pie is baked through on the bottom!
Lower the oven rack:
- Moving the oven rack lower means that the bottom of the pie pan is closer to the heat source. This helps your bottom crust cook through more quickly. (It also helps keep the top of your pie from over-browning!)
Place the pie dish on a baking sheet:
- The hot metal baking sheet directly under the bottom of the pie dish directs extra heat to the bottom crust, helping it brown and cook through.
Use a metal or glass pie plate:
- Glass and metal are the best materials for baking pies, because they heat up quickly and distribute that heat evenly over the bottom and sides of the crust. Glass pie plates have the added advantage of being clear, so you can check that the bottom crust has browned.
Blind bake:
- For a single crust pie that must be baked, such as a pumpkin pie or other custard pie, many bakers opt for blind baking. This is when you bake the empty pie shell in the pan, before the filling goes in and it's baked again. This gives the pie shell a head start; it's baked enough on the bottom that the filling won't soak through.
Variation: Butter Pie Crust for savory pies

While vanilla and cinnamon are delicious flavorings for butter pie crusts, for sweet pies, I have a different flavor that works best for savory pies!
Just omit the vanilla and cinnamon, and instead add a little dried thyme. This aromatic spice pairs perfectly with savory fillings from vegetables to chicken to beef.
What to make with an all butter pie crust
A from-scratch Butter Pie Crust is honestly amazing with every kind of pie.
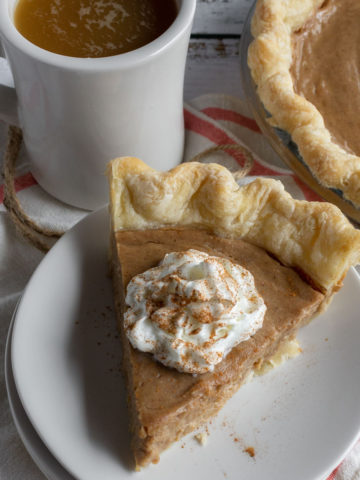
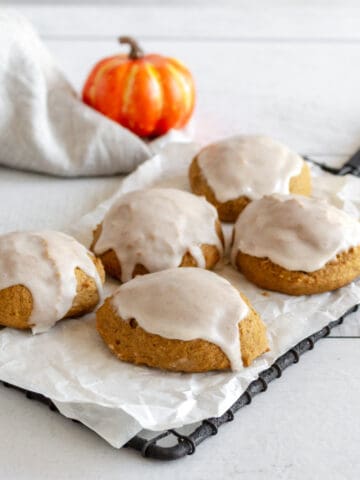
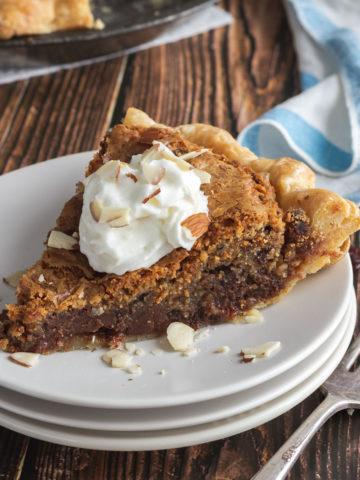
Try a single All Butter Pie Crust with my recipe for Cinnamon Pie or Sweet Potato Pie. A single crust pie shell made with savory thyme is perfect for a Carrot Quiche.
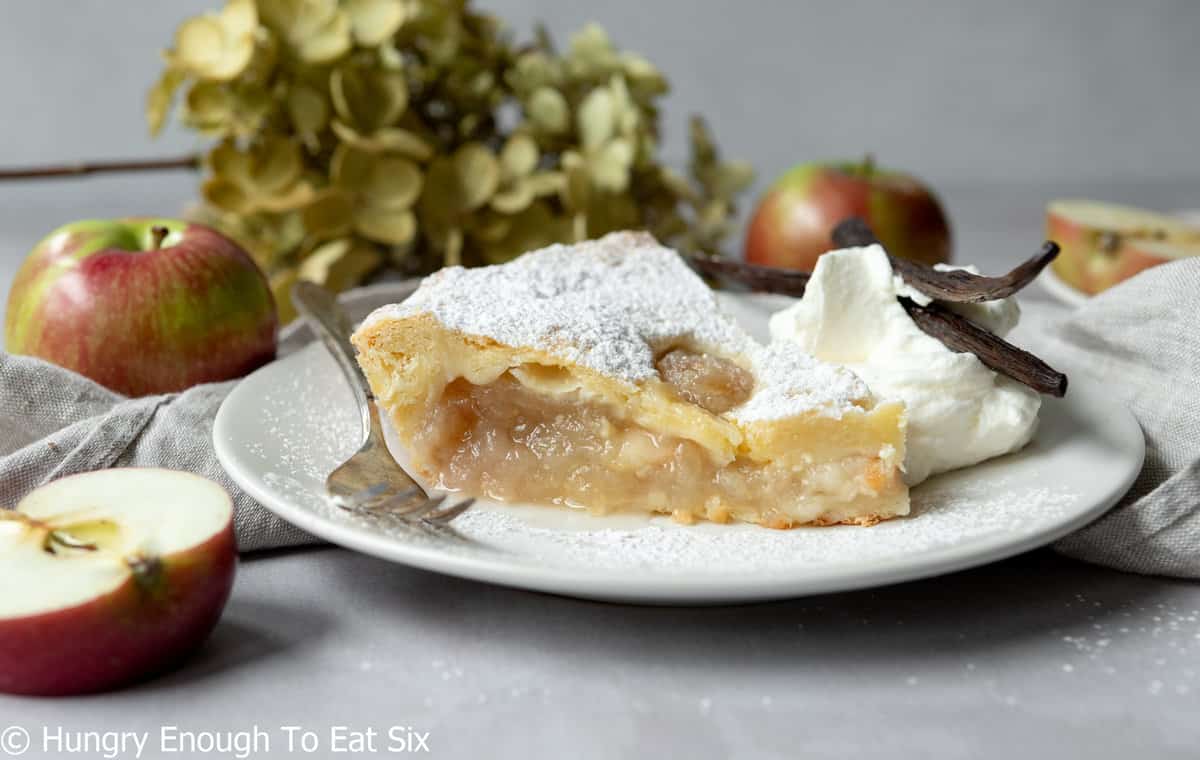
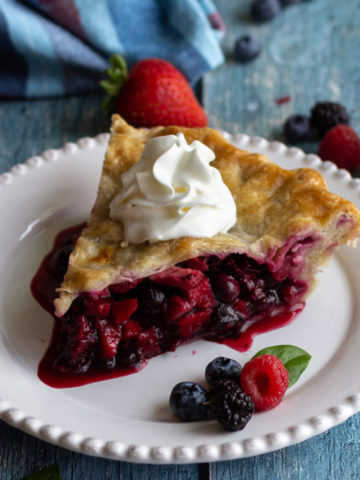
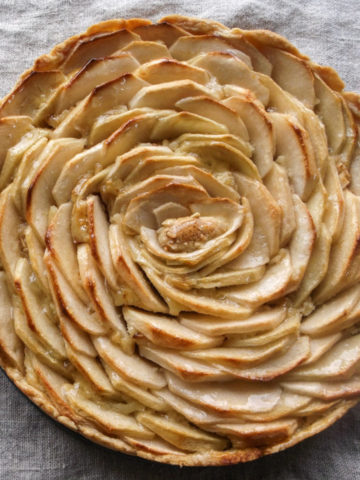
For double crust pies, an All Butter Crust is tasty for my famous Fruit of the Forest Pie and for this Vanilla Apple Pie. Use the thyme-spiced butter pie crust to make double crust Mini Chicken Pot Pies.
I use this same Butter Pie Dough to make hand pies, too! These Coconut Pastries are one of my favorites, and the dough is very good for Pumpkin Cranberry Hand Pies. Save some food from Thanksgiving dinner and use butter pie dough to make Thanksgiving Leftovers Hand Pies!
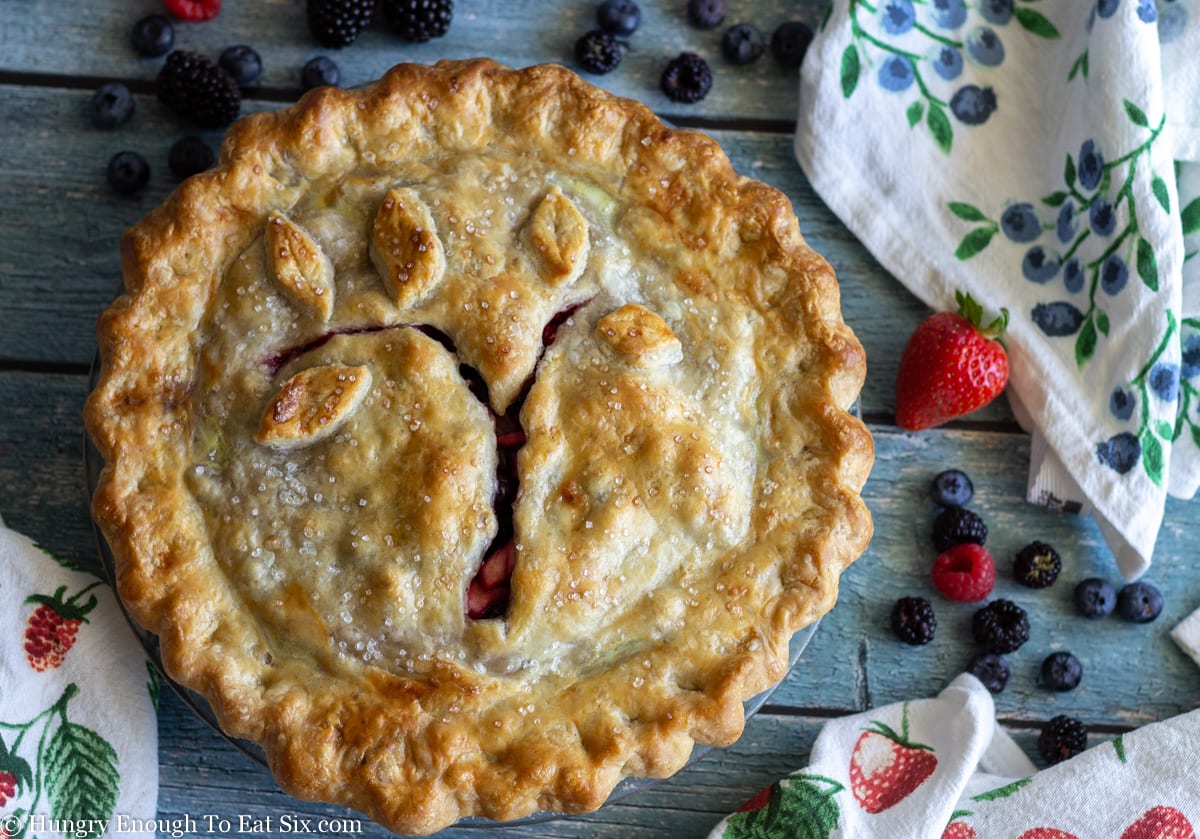
Give the Butter Pie Crust a pretty finish
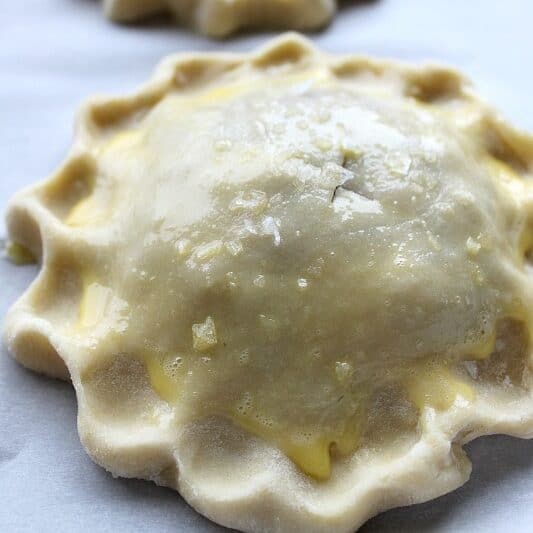
Add an egg wash:
- Whisk a whole egg and a little water together and brush on the crust. This egg wash gives the baked all butter crust a lovely shine.
Sprinkle sugar or salt on the crust:
- Sprinkle granulated sugar or decorating sugar on the top crust of a sweet pie. (That egg wash helps the sugar stick!) This makes the pie look sparkly and dazzling.
- For savory pies, make an attractive top crust by sprinkling flake salt over the surface. Look for brands like Maldon or Curio Spice Company.
Ready to ditch that store-bought stuff? My All Butter Pie Crust recipe and the tips in this post are everything you need to make this from-scratch pie dough with ease—even if you've never made one before!
My hungry fans love this flaky buttercrust because it tastes just as good as the fillings it holds.
The All Butter Pie Crust recipe is below! Make and try it with these amazing pies:
💬 Did you make and devour this recipe? Leave a comment below.
📖 Recipe
All Butter Pie Crust
SAVE THIS RECIPE OR POST!
Equipment
- Large bowl
- Sharp knife
- Pastry cutter
- Bench knife or bench scraper
- Rolling Pin
Ingredients
- 2½ cups all-purpose flour (10.63 ounces)
- 1 teaspoon salt
- ¼ teaspoon ground cinnamon
- 8 ounces unsalted butter, cold (1 cup or 2 sticks)
- 1 teaspoon pure vanilla extract
- Ice water
Instructions
Get organized:
- Have your work area ready before starting; it should be a clean area large enough to roll out the dough. Have ingredients and tools set out and ready to go. Keep the butter and ice water in the fridge until you need them.
Combine the dry ingredients:
- Combine the 2½ cups all-purpose flour,1 teaspoon salt, and ¼ teaspoon ground cinnamon in a large bowl.
Cut in the butter:
- Slice the 8 ounces unsalted butter, cold into very small cubes—about ¼-inch sized. The way I do this is to slice the stick of cold butter lengthwise into 3 planks, then turn them on their side and cut the planks into four sticks. Then, slice straight down from one end to the other to cut the butter sticks into cubes.
- Add the butter cubes to the flour mixture. Break them apart and toss them until they're coated in flour.
- Work the butter into the flour using a pastry blender: press it down through the butter and flour repeatedly, until the mixture is shaggy and crumbly.
- You want to have visible pieces of butter no larger than a pea. For any pieces bigger than this, squeeze them between your fingers to flatten and break them apart.
Add the liquids:
- Add the 1 teaspoon pure vanilla extract to the bowl.
- Then, add 4 tablespoons of the Ice water to the mixture. Use a spoon to toss it into the flour mixture.
- Add another tablespoon of ice water and toss the mixture again. Continue adding ice water one tablespoon at a time and tossing, just until the dough starts clumping together.
- (On dry days, you'll need more water; on humid days, you'll need less.)
- Once you see the dough begin to clump together, squeeze a handful of it: if it holds together with little to no crumbliness, it's ready—stop adding water.
Give it a few squeezes:
- Turn the contents of the bowl out onto a lightly floured surface. Squeeze the pile together with your hands a few times.
- Use your bench scraper to get under the pile: pull the mixture up and fold it over the top. Flatten it with your hands and then repeat. Do this four to five times until the dough has just come together. Do not overwork the dough.
- (There will be pieces of butter visible in the dough, which is good: that's what will make a flaky crust.)
Divide and chill:
- Divide the dough in half. Flatten each half slightly with the palm of your hand; wrap them in plastic wrap. Chill the dough portions in the fridge for 30 minutes.
YIELD:
- My All Butter Pie Crust recipe makes enough dough for 1 double-crust pie or 2 single-crust pies; about 24 ounces of dough.
TO STORE:
- Refrigerate: Wrapped portions of dough can be stored in the fridge for up to three days.
- The dough will be very hard. To make it workable, bang it with a rolling pin to help soften the dough.
- Freeze: Wrap the dough disks well and freeze them up to 3 months.
- To thaw, move the dough portions to the refrigerator. Allow them to thaw overnight.
OPTION—FOOD PROCESSOR:
- After combining the dry ingredients pour them into the bowl of a food processor. Cube the butter and add this in.
- Pulse the food processor several times until the butter has been cut into the dough. It should have a shaggy appearance.
- Add the vanilla. With the food processor running on low, spoon the ice water in a tablespoon at a time. Continue adding tablespoons of water until the dough JUST comes together.
- Turn the dough out of the food processor and squeeze it together one or two times. Divide and refrigerate it as instructed above.
VARIATION—SAVORY PIES:
- Omit the cinnamon and vanilla extract. Add a teaspoon of dried thyme to the flour mixture before cutting in the butter.
- This savory version is delicious with pie fillings of meat, cheese, vegetables, and eggs (like quiches). You can also use the dough to make appetizers like savory twists or crackers.
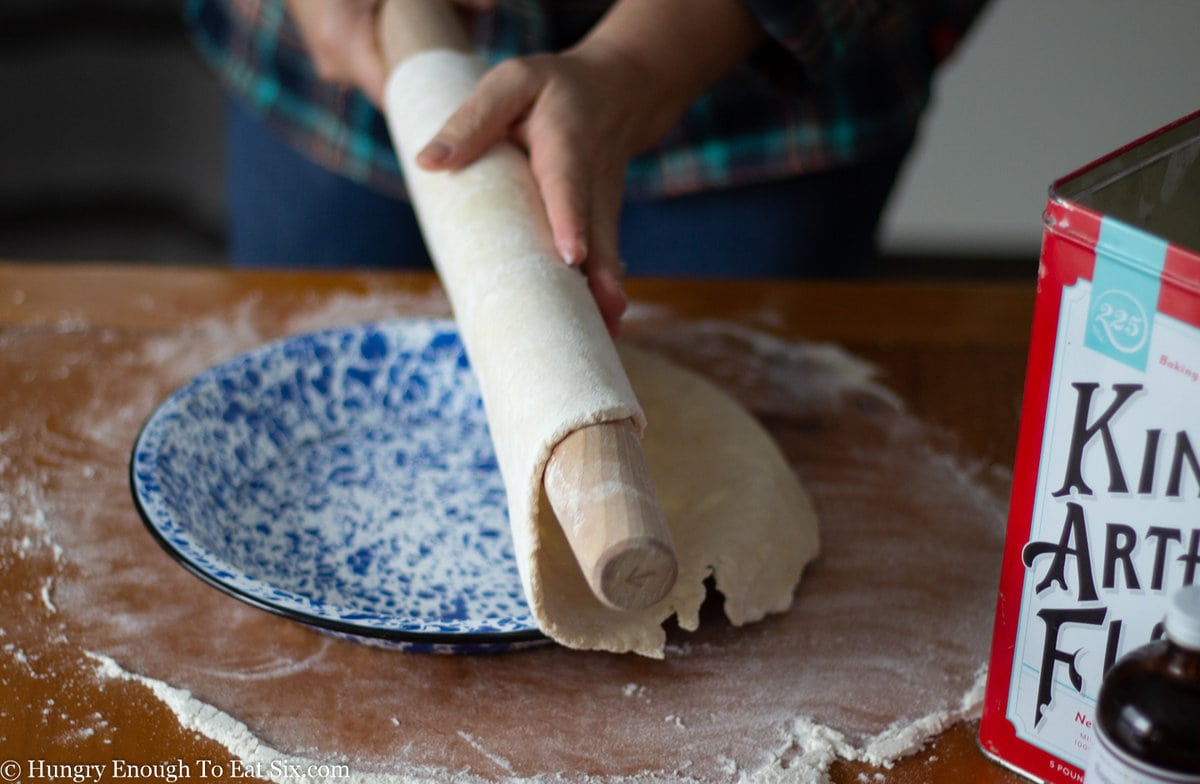
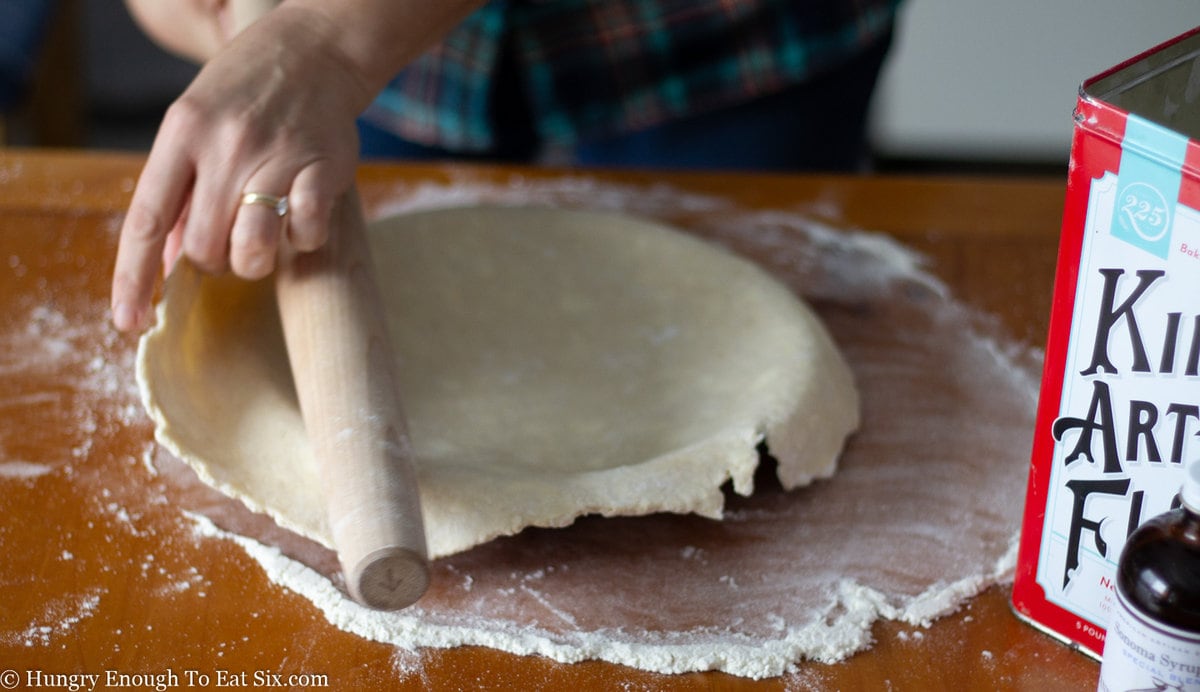
ROLLING OUT ALL BUTTER PIE DOUGH:
- Take a chilled disk of dough from the fridge. Set it on a floured work space and sprinkle a little flour over the top. The dough will be very firm when it first comes out of the fridge, but it will quickly become workable.
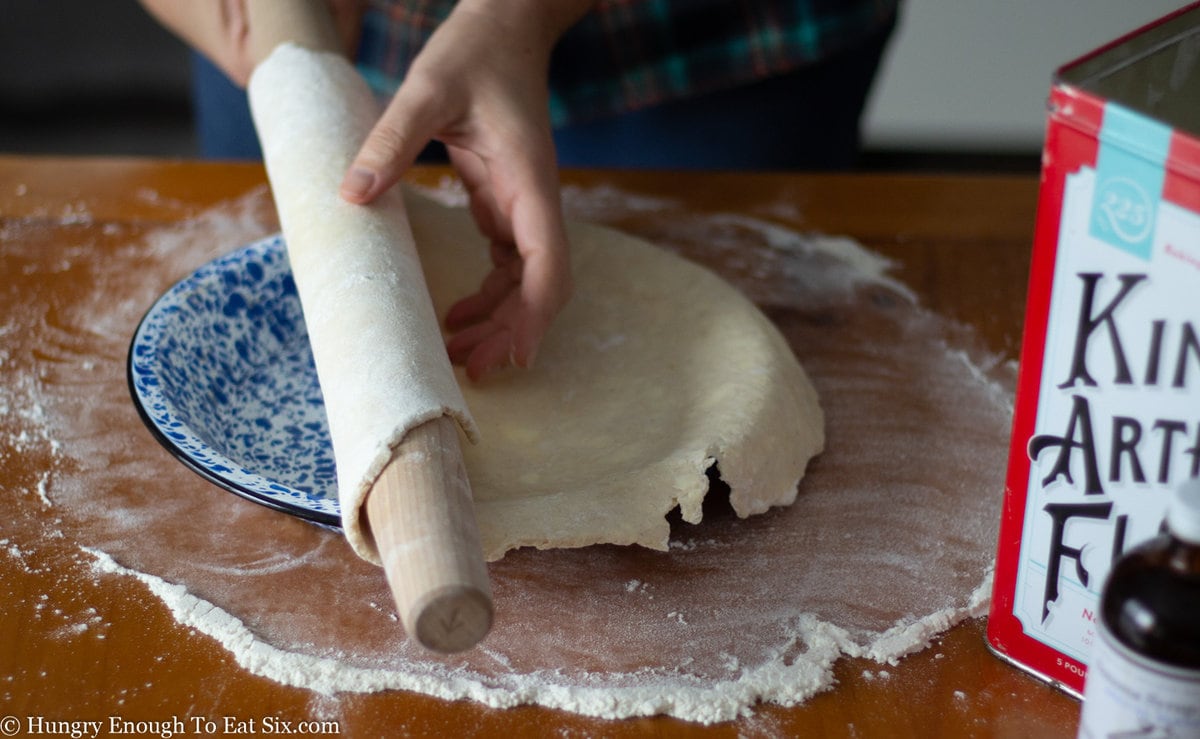
- Place your rolling pin in the middle of the dough and roll towards the outer edge.
- Pick up the dough and rotate it a quarter-turn. (Don't flip it: keep the same side up the whole time.)
- Dust a little flour under the dough if it's sticking. Roll the dough again, starting in the center and rolling towards the outer edge.
- Continue these steps of rolling and rotating, until you have a circle of dough that's ¼-inch thick and large enough for your pie.
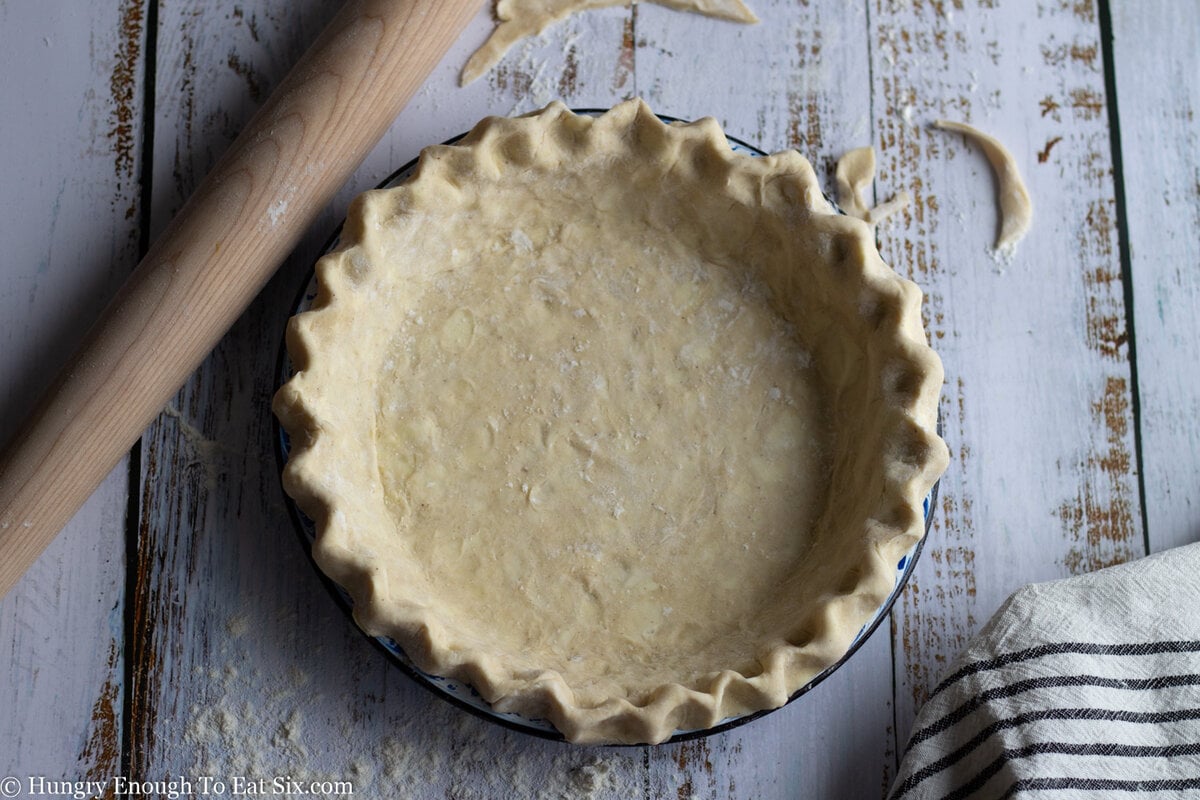
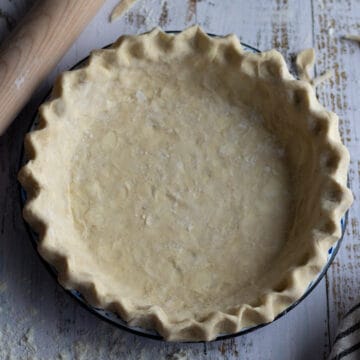
FITTING THE PIE DOUGH INTO THE PIE PLATE:
- Cut out a circle large enough for your pie pan. Gently drape an edge over your rolling pin, then use the pin to lift the dough up and into your pan.
- Press the dough along the bottom of the pie plate. Then, press it up along the sides; there should be pie dough hanging over the sides all around.
- Lightly cover the pie shell with plastic wrap and pop it in the fridge while you roll out the top crust.
BLIND BAKING THE PIE CRUST:
- Once you fit the pie dough into the pie plate, trim the overhanging dough to about an inch. Roll the dough edge under itself, then firmly crimp it down all around the edge of the pan.
- Gently press a piece of foil or parchment paper into the pie shell, then fill it about ¾ of the way with pie weights or dried beans. Refrigerate the pie shell for 30 minutes while preheating the oven to 375°F.
- Bake the pie shell for 20 minutes. Then, remove the pie weights and foil/parchment. Prick the bottom and sides of the pie shell all over with a fork.
- → For a pie that you will bake after filling: Bake the pie shell for 5 minutes longer, then remove it from the oven. Allow the pie shell to cool slightly before filling and baking.
- → For a pie that does NOT get baked again: Bake the pie shell for 10 minutes longer until it is golden-brown all over. Remove it from the oven. Let the pie shell cool completely before filling.
ADDING A TOP CRUST:
- After you add your filling to the unbaked pie shell, roll out the top crust using the same technique you did for the bottom crust (roll from the middle; make a quarter-turn after each pass).
- Cut out the circle size appropriate for your pan. Make any decorative cut-outs in the dough now. Use the rolling pin to gently lift up the dough and drape it over the top of your pie.
- Roll the edge of the top crust under the edge of the bottom crust, and do this around the entire pie. Firmly crimp the edge down to the rim of the pie pan.
- Lightly cover the pie with plastic wrap and refrigerate it for 30 minutes before baking.
Notes
- The prep and chill times are for making the dough only. Plan extra time for rolling dough and making your pie.
- The vanilla extract and cinnamon can be omitted if you prefer, but give them a try; they're delicious with all kinds of sweet pie fillings.
- This all butter crust puffs up a lot during baking. Very intricate cut-outs may lose some definition.
- Cold butter is the most important part of a successful pie crust. Keep your butter in the fridge until you need it.
- Bake this crust at a higher temp to start: for the first 20 minutes, bake the pie at 400°F, then reduce the heat to 350°F to finish baking to a beautiful, golden brown color. This hotter initial burst helps the crust puff up to make those beautiful layers.
- Based on techniques I learned at the King Arthur Baking Company Education Center.
Nutrition


Michelle says
I live in Las Vegas and I can never get my dough to work just right until this recipe. I do have a question though... can the dough be frozen? I use a crumble too on my apple pie and want to save the other half.
Nancy Mock says
Hi Michelle, I’m so happy to hear that you’re having success with my pie crust dough! And yes: the dough can be frozen. Wrap it well and store it in the freezer for up to three months. It’s great to have on hand whenever the mood to make a pie strikes. Let it thaw in the fridge for a day, and then it will be ready to use. Thanks for this question and for trying my recipe!
Donna Armstrong says
Hi
Thanks. I am going to try this all again. I would like to add pies to my cookie business. I've never had much luck with pie crust.
I am sort of a friend of your sisters. She is actually a friend of my sons.
Happy Holidays!
Nancy Mock says
Hi Donna, if you get to try this pie crust recipe let me know what you think!